The SmartApp
A Web Services SmartApp exposes endpoints that third parties can make REST calls to. It can then do anything a normal SmartApp can do - get device status, actuate devices, etc. - and send a response back to the calling client.
Enable OAuth
For a SmartApp to expose endpoints that can receive REST calls from a third party, OAuth must be enabled.
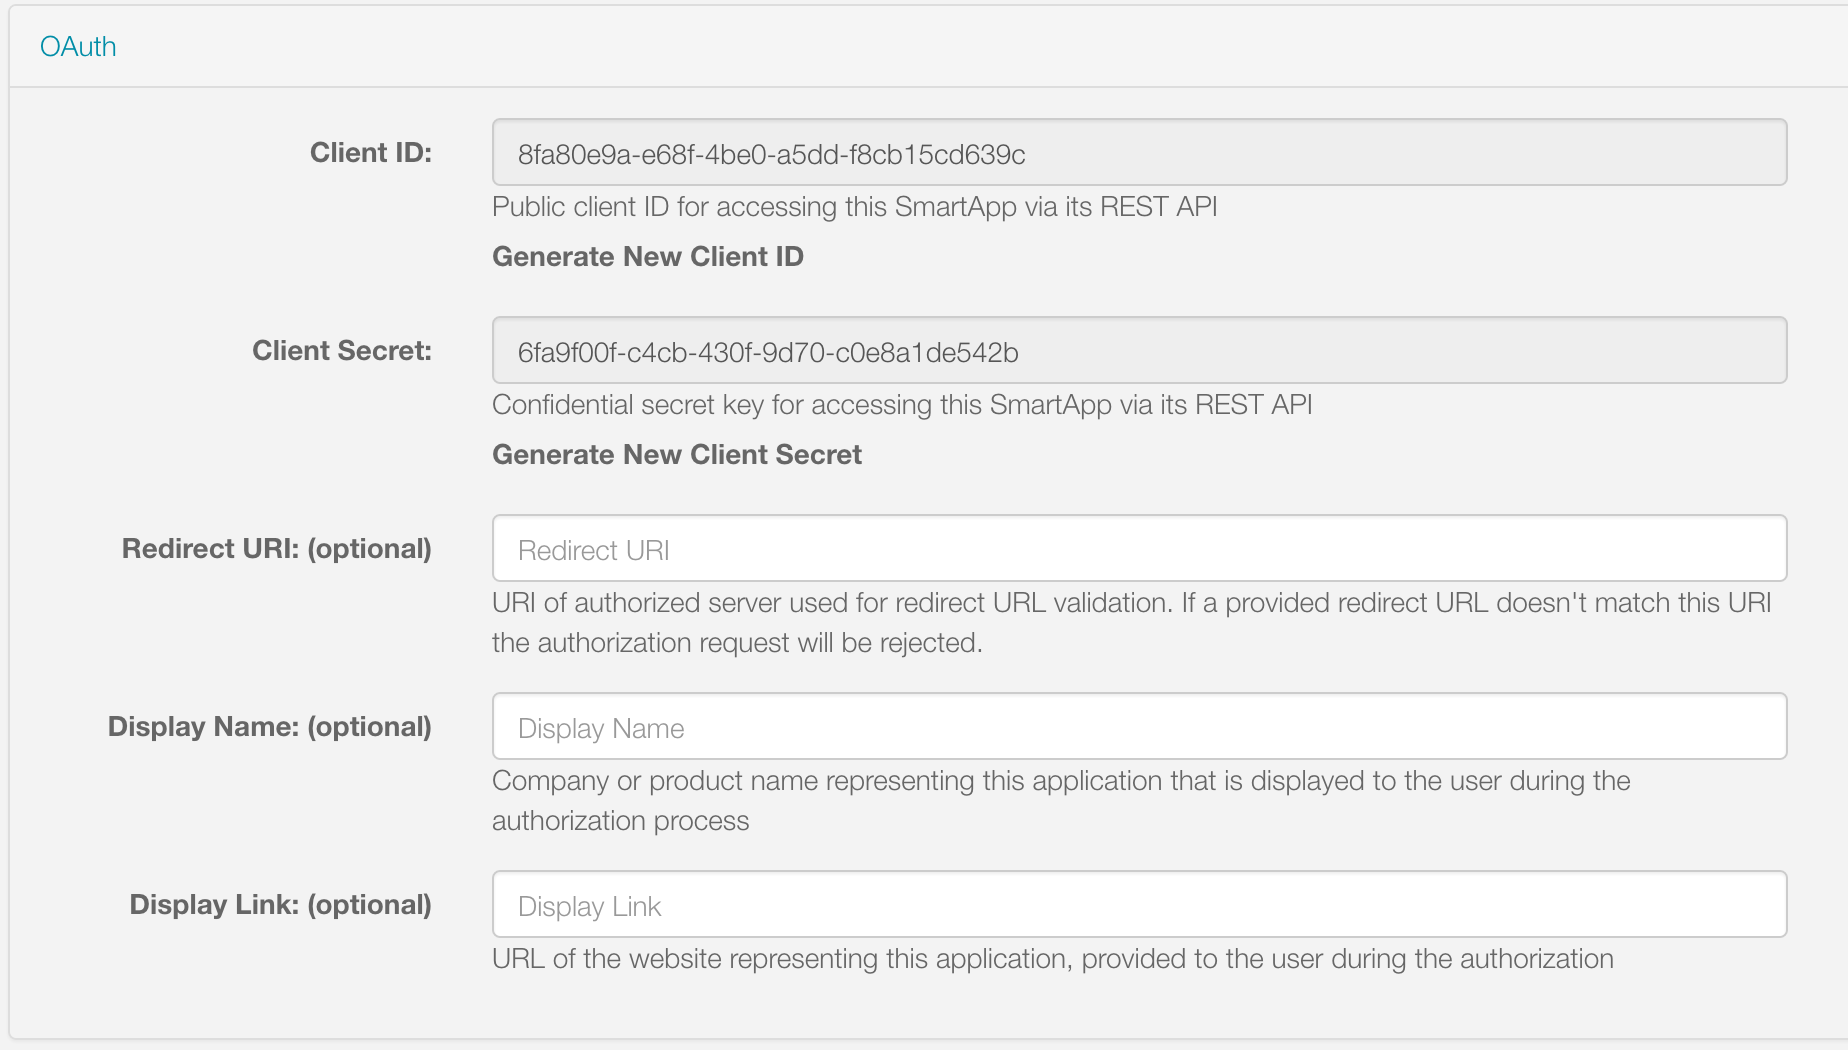
OAuth can be enabled for a SmartApp via the App Settings page. In the OAuth section, check the box to enable OAuth. A client ID and secret will be generated for this SmartApp. These will be used as part of the OAuth flow to obtain an access token for this SmartApp.
There is an option to specify a Redirect URI.
This URI will be used to validate the redirect_uri passed in with the request for the authorization code.
The value of this field can be a single value, or a comma-delimited list of values.
For example:
http://myserverhostname.com
or
http://myserverhostname1.com,http://myserverhostname2.com,http://myserverhostname3.com
During validation, the redirect_uri passed in with the authorization code request will be checked against the URIs defined in this field.
The port does matter during validation.
If there is no match, validation will fail with the following error:
OAuth2 Error

error="invalid_grant", error_description="Invalid redirect: http://myserverhostname.com/oauth/callback does not match one of the registered values: [http://myserverhostname1.com/oauth/callback]"
You can also set the Client Display Name and Client Display Link. These will be used on the PEA HiVE Authorization page to inform the user who is requesting access to their devices.
Preferences
Part of the Authorization Flow that installs the SmartApp requires the user to authorize specific devices that the third party can interact with. The types of devices that may be authorized for Web Services SmartApps are controlled through the SmartApp’s preferences.
The intent of the Authorization page is to simply allow the user to authorize specific devices. This can be accomplished in one of two ways:
- Specify a simple, single page that allows the user to select from a set of devices, or
- Specify a specific preferences page to be used by the Authorization web page.
An example of a simple, single page that will allow the user to select from a set of devices:
preferences {
    section("Control these switches...") {
        input "switches", "capability.switch"
    }
    section("Control these motion sensors...") {
        input "motion", "capability.motionSensor"
    }
}
Here is an example that specifies a specific page to be used during authorization, using the oauthPage option to preferences:
Warning
Currently, using required inputs does not work inside of page declarations when using oauthPage. This is a known issue and is currently being worked on. We recommend using non-required inputs, by explicitly setting required: false, when using oauthPage pages.
preferences(oauthPage: "deviceAuthorization") {
    // deviceAuthorization page is simply the devices to authorize
    page(name: "deviceAuthorization", title: "", nextPage: "instructionPage",
         install: false, uninstall: true) {
        section("Select Devices to Authorize") {
            input "switches", "capability.switch", title: "Switches:", required: false
            input "motions", "capability.motionSensor", title: "Motion Sensors:", required: false
        }

    }

    page(name: "instructionPage", title: "Device Discovery", install: true) {
        section() {
            paragraph "Some other information"
        }
    }
}
If you require additional, non-device preferences inputs, you can use dynamic pages.
The oauthPage must be a static (non-dynamic) page, and be the first page displayed:
preferences(oauthPage: "deviceAuthorization") {
    // deviceAuthorization page is simply the devices to authorize
    page(name: "deviceAuthorization", title: "", nextPage: "otherPage",
         install: false, uninstall: true) {
        section("Select Devices to Authorize") {
            input "switches", "capability.switch", title: "Switches:", required: false
            input "motions", "capability.motionSensor", title: "Motion Sensors:", required: false
        }

    }

    page(name: "otherPage")
}

def otherPage() {
    dynamicPage(name: "otherPage", title: "Other Page", install: true) {
        section("Other Inputs") {
            input "sometext", "text"
            input "sometime", "time"
        }
    }
}
Mapping endpoints
To expose a callable endpoint in your SmartApp, use mappings.
Specify the various endpoints using path, and specify the supported HTTP methods (GET, PUT, POST, and DELETE).
Each action specified is associated with the name of a method that will handle the request.
mappings {
    path("/foo") {
        action: [
            GET: "getFoo",
            PUT: "putFoo",
            POST: "postFoo",
            DELETE: "deleteFoo"
        ]
    }
    path("/bar") {
        action: [
            GET: "getBar"
        ]
    }
}

def getFoo() {}
def putFoo() {}
def postFoo() {}
def deleteFoo() {}
def getBar() {}
There is no limit to the number of endpoints a SmartApp exposes, but the path level is restricted to four levels deep (i.e., /level1/level2/level3/level4).
You can specify variable URL path parameters using the : prefix in the path:
mappings {
    path("/foo/:param1/:param2") {
        action: [GET: "getFoo"]
    }
}
Request handling
When a request is made to one of the SmartApp’s endpoints, its associated request handler method will be called.
Every request handler method has available to it a request object that represents information about the request, and a params object that contains information about the request parameters.
Important
All request or path parameters should be validated in your request handler. Never allow parameters to arbitrarily execute device commands or otherwise modify data.
Path variables
Any path variables you defined in the path are available via the injected params object:
mappings {
    path("/switches/:command") {
        action: [PUT: "updateSwitches"]
    }
}

def updateSwitches() {
    def cmd = params.command
    log.debug "command: $cmd"
    switch(cmd) {
        case "on":
            // handle on command
            break
        case "off":
            // handle off command
            break
        default:
            httpError(501, "$command is not a valid command for all switches specified")
    }
}
Query parameters
URL query parameters sent on the request are available via the params object:
def someHandler() {
    // this endpoint can accept the "foo" query parameter
    def fooParam = params.foo
    log.debug "foo parameter: $foo"
}
Request body parameters
PEA HiVE supports JSON or XML request body parameters.
They can be accessed via request.JSON and request.XML:
// json on request: '{"foo": "bar"}'
def someJSONHandler() {
    def fooJSON = request.JSON?.foo
    log.debug "foo json: $fooJSON"
}

// xml on request: '<foo>bar</foo>'
def someXMLHandler() {
    def fooXML = request.XML?.foo
    log.debug "foo xml: $fooXML"
}
Tip
Use the ? (safe navigation operator) to avoid a NullPointerException if the request JSON or XML is null (in case the request did not send JSON or XML).
The JSON available on the request will be the result of calling new JsonSlurper().parseText(). You can learn more about working with JSON in Groovy here.
Similarly, the XML on request is the result of calling new XmlSlurper().parseText(). Learn more about working with XML in Groovy here.
Response handling
Defaults
Each HTTP method (GET, PUT, POST, DELETE) request handler returns a default response.
Some request handlers may return a map that will be serialized to JSON on the response, and some may specify their own response by using the render() method:
| Request Method | Default HTTP Response Code | JSON Serialization Support | render() support |
|---|---|---|---|
GET |
200 OK |
yes | yes |
POST |
201 Created |
yes | yes |
PUT |
204 No Content |
no | no |
DELETE |
204 No Content |
no | no |
Automatic JSON serialization
GET and POST request handlers may return a map, which will be serialized to JSON and returned to the client with Content-Type: application/json:
mappings {
    path("/test") {
        action: [
            GET: "responseTest",
            POST: "responseTest"
        ]
    }
}

def responseTest() {
    // a map is serialized to JSON and returned on the response
    return [data: "test"]
}
The response of executing a GET or POST request on the /test endpoint results in the following:
HTTP/1.1 200 OK
    Content-Type: application/json;charset=utf-8
    Date: Tue, 29 Mar 2016 13:53:14 GMT
    Server: Apache-Coyote/1.1
    Set-Cookie: JSESSIONID=XXXXXXXXXXXXXXXX-n1; Path=/; Secure; HttpOnly
    X-RateLimit-Current: 0
    X-RateLimit-Limit: 250
    X-RateLimit-TTL: 60
    transfer-encoding: chunked
    Connection: keep-alive

    {"data":"test"}
Using render() to control the response
GET and POST request handlers also support the ability to return a custom response using the render() method:
mappings {
    path("/test") {
        action: [
            GET: "responseTest",
            POST: "responseTest"
        ]
    }
}

def responseTest() {
    def html = """
    <!DOCTYPE html>
    <html>
        <head><title>Some Title</title></head>
        <body><p>Testing</p></body>
    </html>"""

    render contentType: "text/html", data: html, status: 200
}
The response of executing a GET or POST request on the /test endpoint results in the following:
HTTP/1.1 200 OK
    Content-Type: text/html;charset=utf-8
    Date: Tue, 29 Mar 2016 15:00:32 GMT
    Server: Apache-Coyote/1.1
    Set-Cookie: JSESSIONID=1A4382D4BDFCCB31CD6C4EF3C2E3D693-n5; Path=/; Secure; HttpOnly
    Vary: Accept-Encoding
    X-RateLimit-Current: 0
    X-RateLimit-Limit: 250
    X-RateLimit-TTL: 60
    transfer-encoding: chunked
    Connection: keep-alive

    <!DOCTYPE html>
    <html>
        <head><title>Some Title</title></head>
        <body><p>Testing</p></body>
    </html>
If not specified, the contentType will be “application/json”, and the status will be 200.
Error handling
Default errors
The following errors may be returned by the PEA HiVE platform:
| HTTP Response Code | Error Message | Cause |
|---|---|---|
401 (Unauthorized) |
{“error”: “invalid_token”, “error_description”: “<TOKEN>”} | Invalid token for the SmartApp installation. |
403 (Forbidden) |
{“error”:true, “type”:”AccessDenied”, “message”:”This request is not authorized by the specified access token”} | No installed SmartApp can be found associated with the token. |
404 (Not Found) |
{“error”:true,”type”:”SmartAppException”,”message”:”Not Found”} | The endpoint path requested does not exist. |
405 (Method Not Allowed) |
{“error”:true,”type”:”SmartAppException”,”message”:”Method Not Allowed”} | An endpoint path was called but no request handler is defined for the specified request method (e.g., issuing a POST request to an endpoint path that only handles GET requests) |
429 (Too Many Requests) |
{“error”: true, “type”: “RateLimit”, “message”: “Please try again later”} | The rate limit for this SmartApp installation has been exceeded. See the Web services rate limit headers documentation for more information. |
500 (Server Error) |
{“error”:true, “type”:”<EXCEPTION-TYPE>”, “message”: “An unexpected error has occurred”} | An unhandled exception occurred in the processing of the request. Check the PEA HiVE live logging to debug. |
Custom errors
If your endpoint needs to send an error response, use the httpError() method:
def someHandler() {
    def foo = request.JSON?.foo

    if (!foo) {
        httpError(400, "Foo parameter required")
    }
}
A SmartAppException will be thrown, and a response will be sent to the client with the specified HTTP code.
The body of the response will be application/json, and look like this:
{
    "error":true,
    "type":"SmartAppException",
    "message":"your error message"
}
You should send appropriate error codes and messages for any errors.